
SETUP GUIDE · EPSON TM-m30 FAMILY
Unbox it, find its IP, trust the certificate, print.
A from-the-box walkthrough for the TM-m30, TM-m30II and TM-m30III — the exact steps our own founder needed and didn't find written down anywhere, including the one-time certificate visit almost every guide skips.
About a 20-minute read, plus however long the paper takes to load.
Before you start
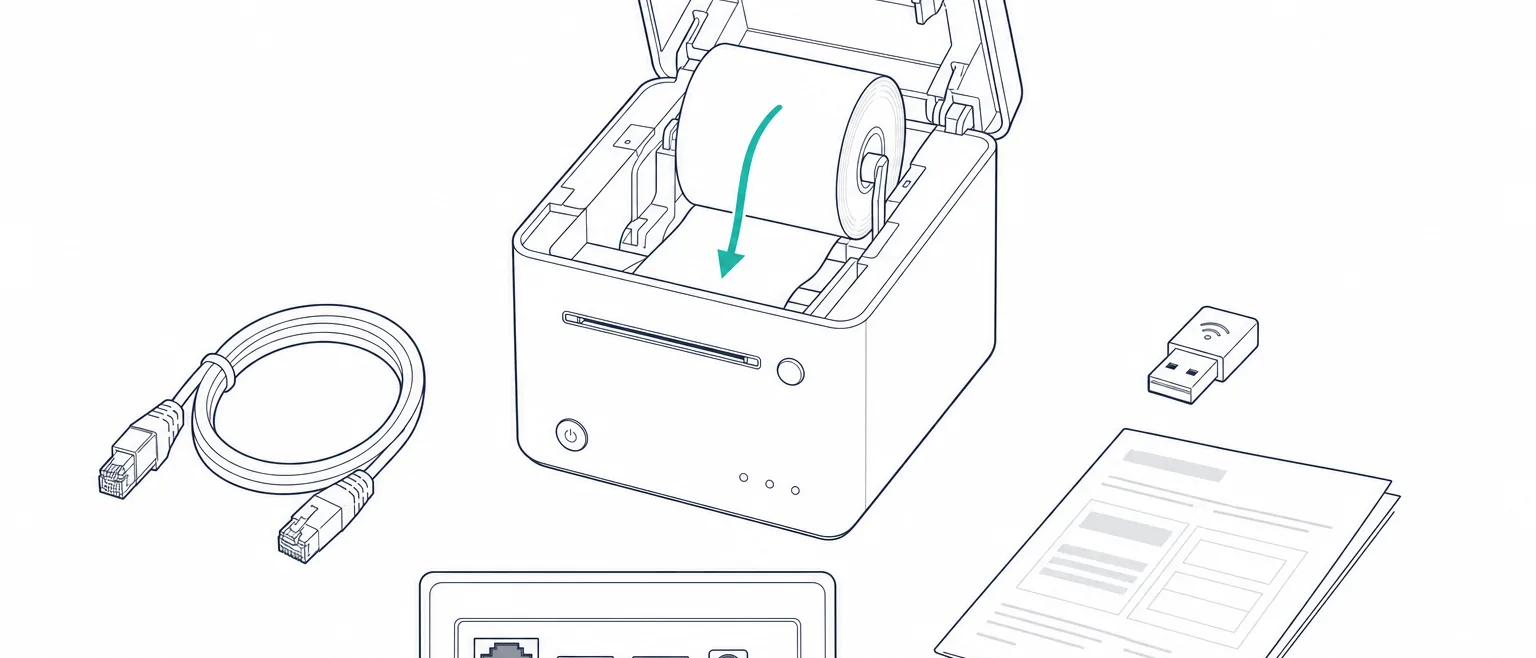
- The printer, its box contents, and a flat surface near a power outlet
- Either an Ethernet cable to your router, or your shop Wi-Fi name and password
- A phone or laptop on the same network, to read the status sheet's IP and open the printer's web page
- Your LoudCurtain Queuer dashboard, signed in, with a queue already created
01 · KNOW YOUR MODEL
Three printers, one family, real differences
The TM-m30, TM-m30II and TM-m30III share a shape and a paper roll, but their wireless options, default logins and certificate behaviour are not identical. This table is the one place all three sit side by side.
Read this table once, then jump straight to the section for your connection: §05 for a cable, §06 for the dongle.
| Model | Built in | Wi-Fi dongle | Status sheet | Web config login | HTTPS by default |
|---|---|---|---|---|---|
m30Built to spec, hardware test pending | Ethernet · USB-B (to a computer) · USB-A (accessory) · Wi-Fi model exists · Bluetooth model exists | OT-WL02, OT-WL05 Recommended: OT-WL05 | Hold 3s | EpsonNet Config (Web) epson / try "epson" or leave it blank | Not documented — don't assume either way |
m30IITested on this printer | Ethernet · USB-B (to a computer) · USB-A (accessory) · Wi-Fi model exists · Bluetooth model exists | OT-WL06 Recommended: OT-WL06 | Hold 3s | EpsonNet Config (Web) epson / the printer's serial number | Yes — self-signed certificate, out of the box |
m30IIIBuilt to spec, hardware test pending | Ethernet · USB-B (to a computer) · USB-A (accessory) · USB-C (tablet power out) · Wi-Fi model exists · Bluetooth model exists | OT-WL06 Recommended: OT-WL06 | Hold 3s + a Feed-count selection step | Web Config — / the printer's serial number | Yes — self-signed certificate, out of the box |
"Wi-Fi model exists" describes a factory SKU, not every unit of that model — availability differs by region, and a Standard-model TM-m30III has no built-in wireless at all. If you're not sure which you bought, the dongle column is the path that works regardless.
02 · GETTING STARTED
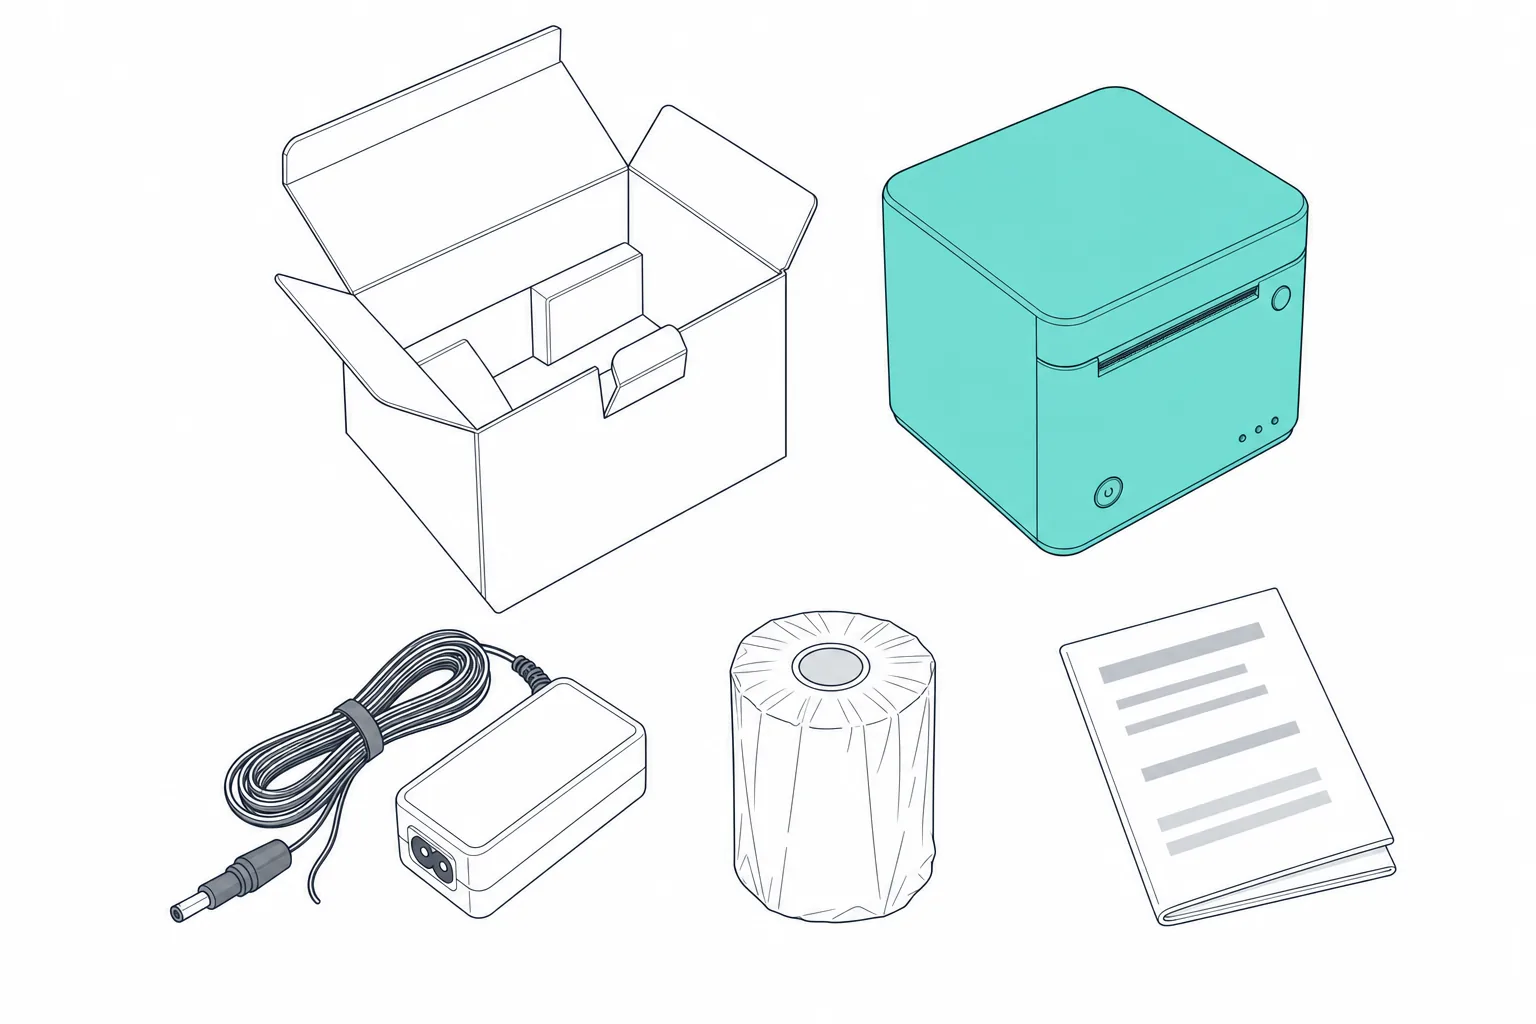
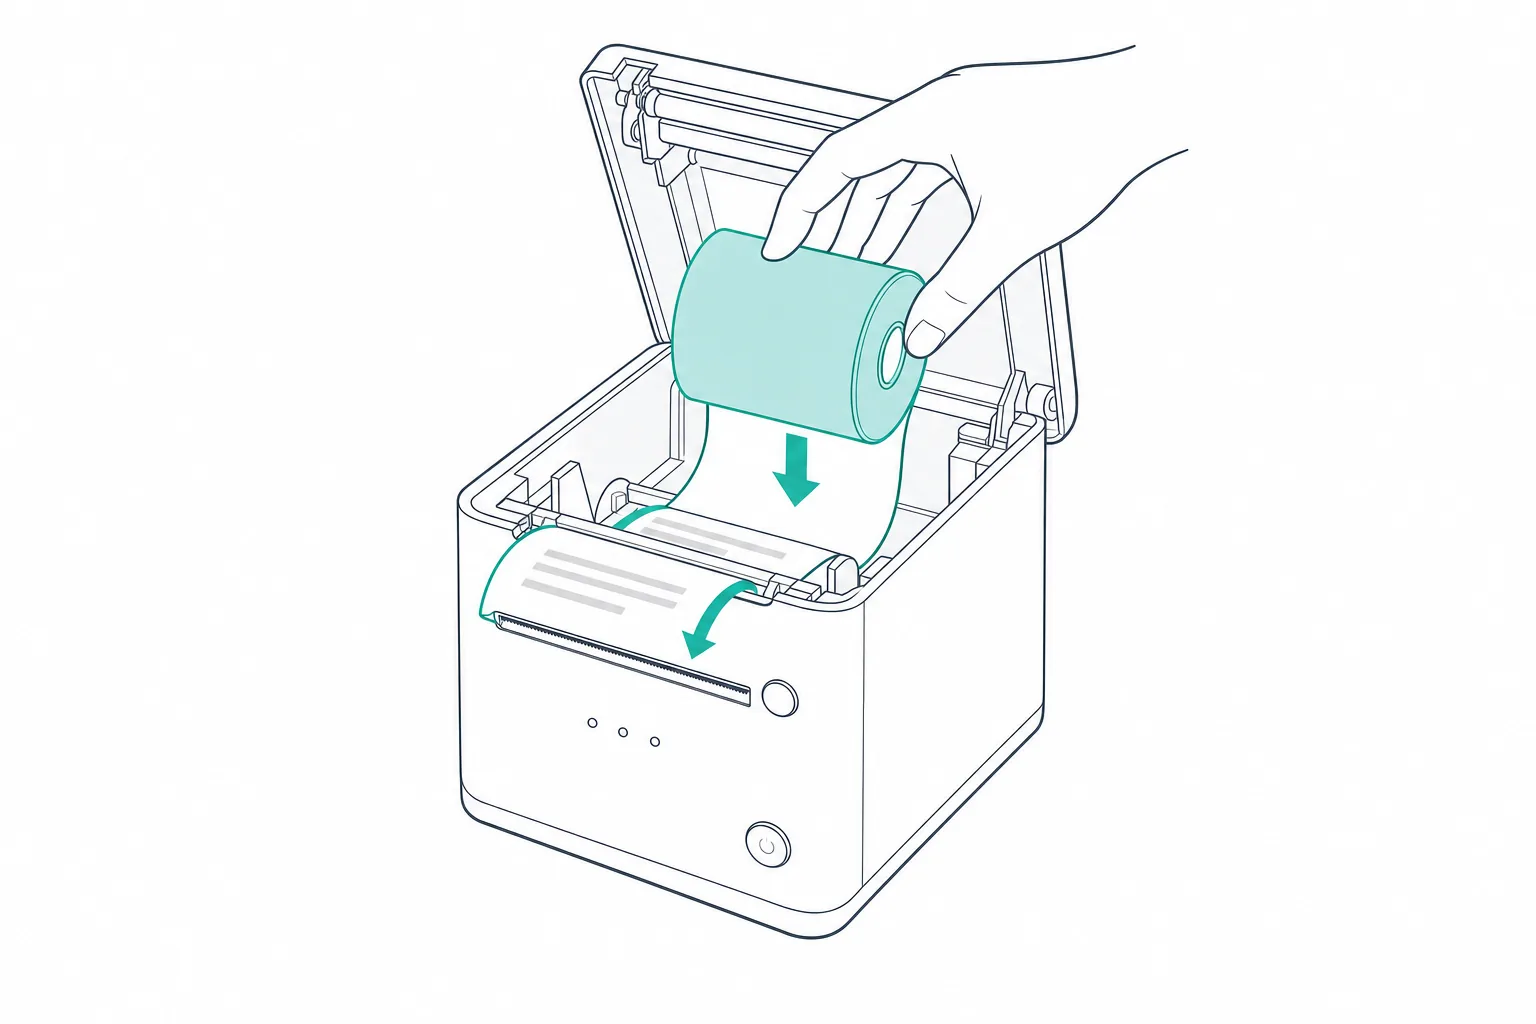
Unbox it and load the paper
Two minutes, no tools.
Unbox and set it down
Drop in the paper
03 · POWER, BUTTONS & LIGHTS
What's on the case, and what its lights mean
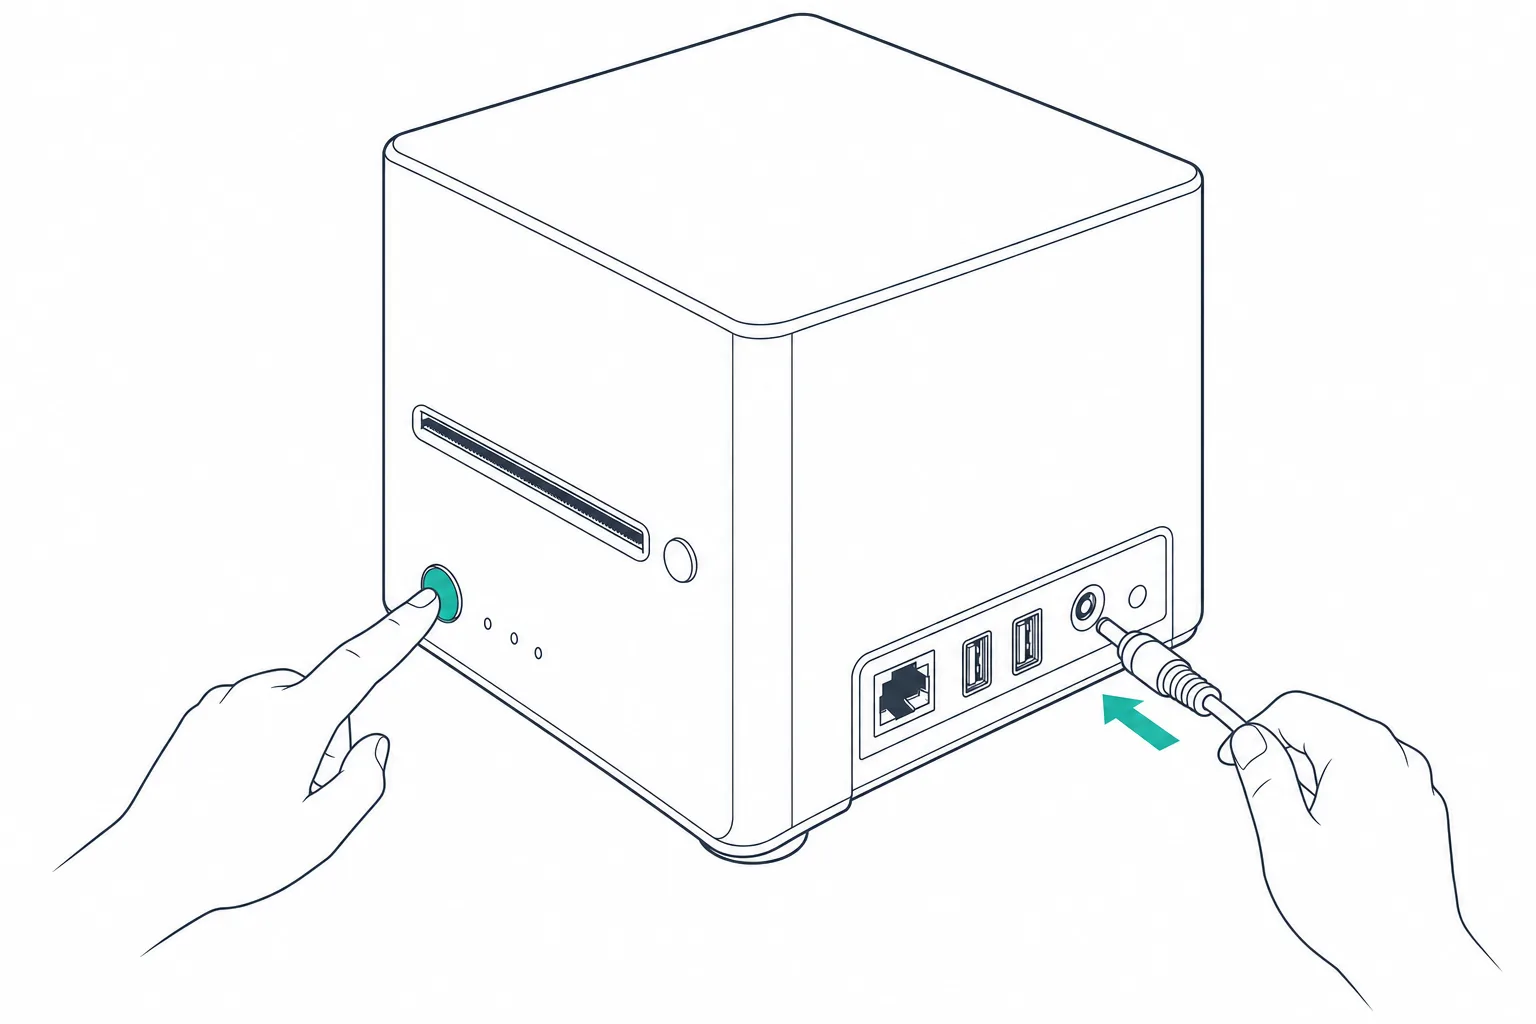
Three buttons on every model, plus a status-sheet button under the connector-panel cover that most setup instructions never mention.
Power it on
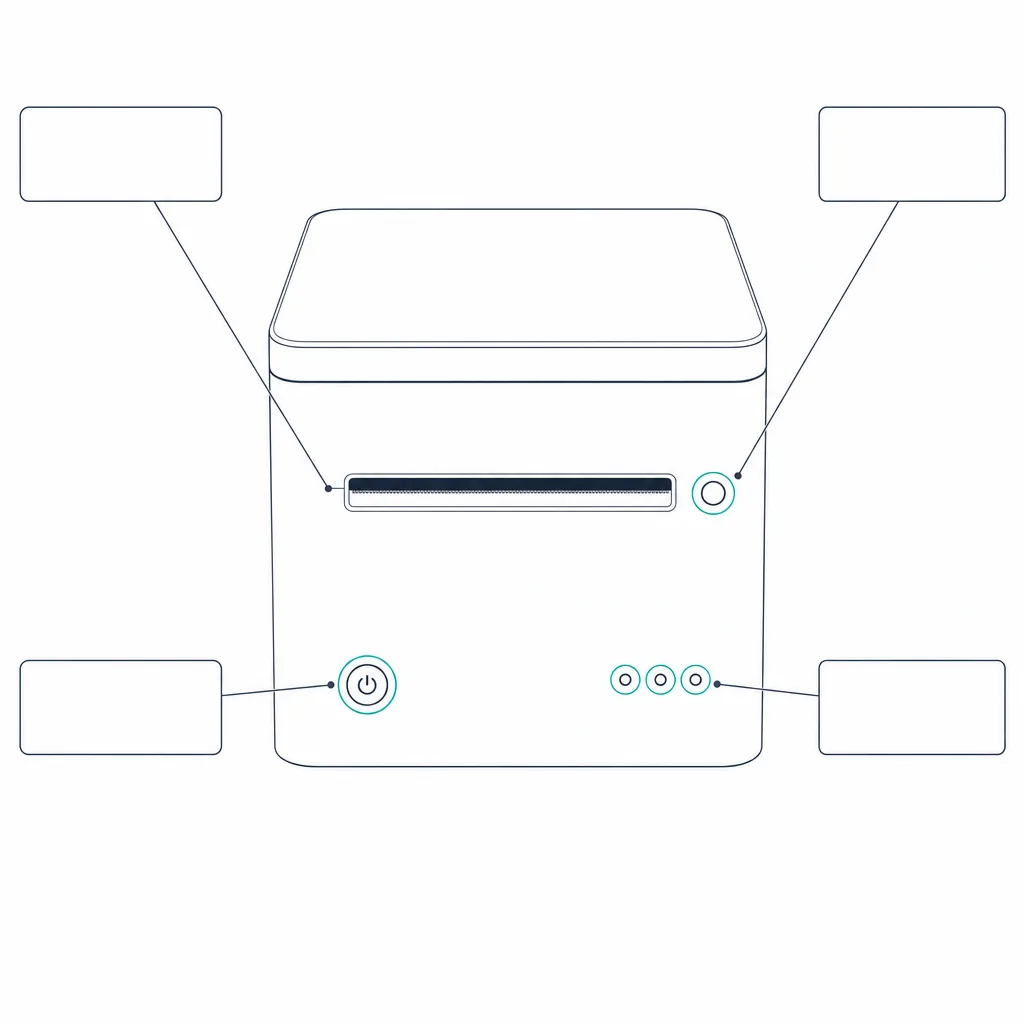
Front panel: power button, feed button, and the paper-near-end window. A flashing paper light means the printer is waiting for a feed-button press, not that it's broken.
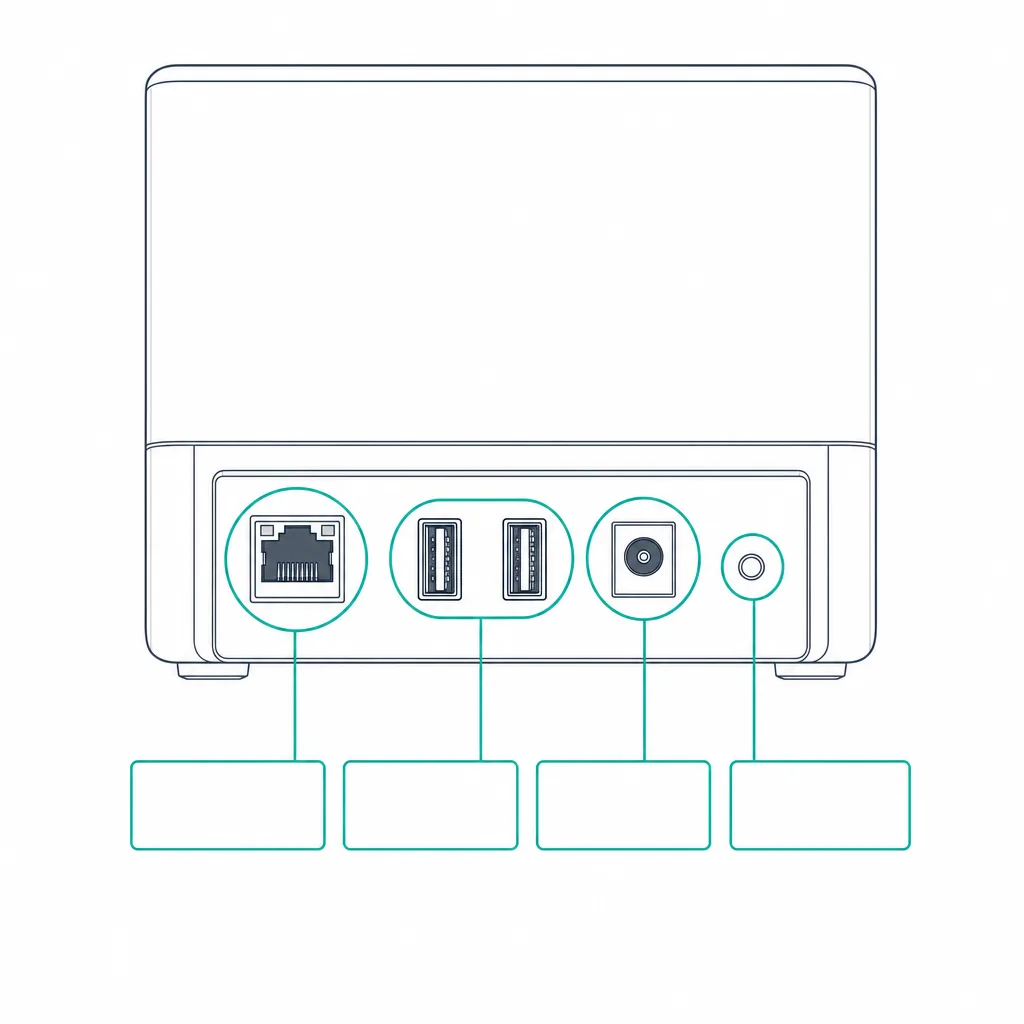
Connector panel, under the bottom cover: Ethernet, USB-B to a computer, one or more USB-A accessory ports for the Wi-Fi dongle, the DC power jack, and the recessed status-sheet button (§04).
Epson is explicit about this in its own documentation: you cannot identify a specific error from an LED's blink pattern. Flashing separates recoverable states from the rare unrecoverable one — it does not tell you which recoverable state you're in. Read the actual status sheet (§04) or the printer's web page (§07) for that.
04 · FIND ITS IP ADDRESS
Print the status sheet
This is the step every other guide skips, and the one our own setup got stuck on: the printer's IP isn't on a sticker, it's on a printout you have to ask for.
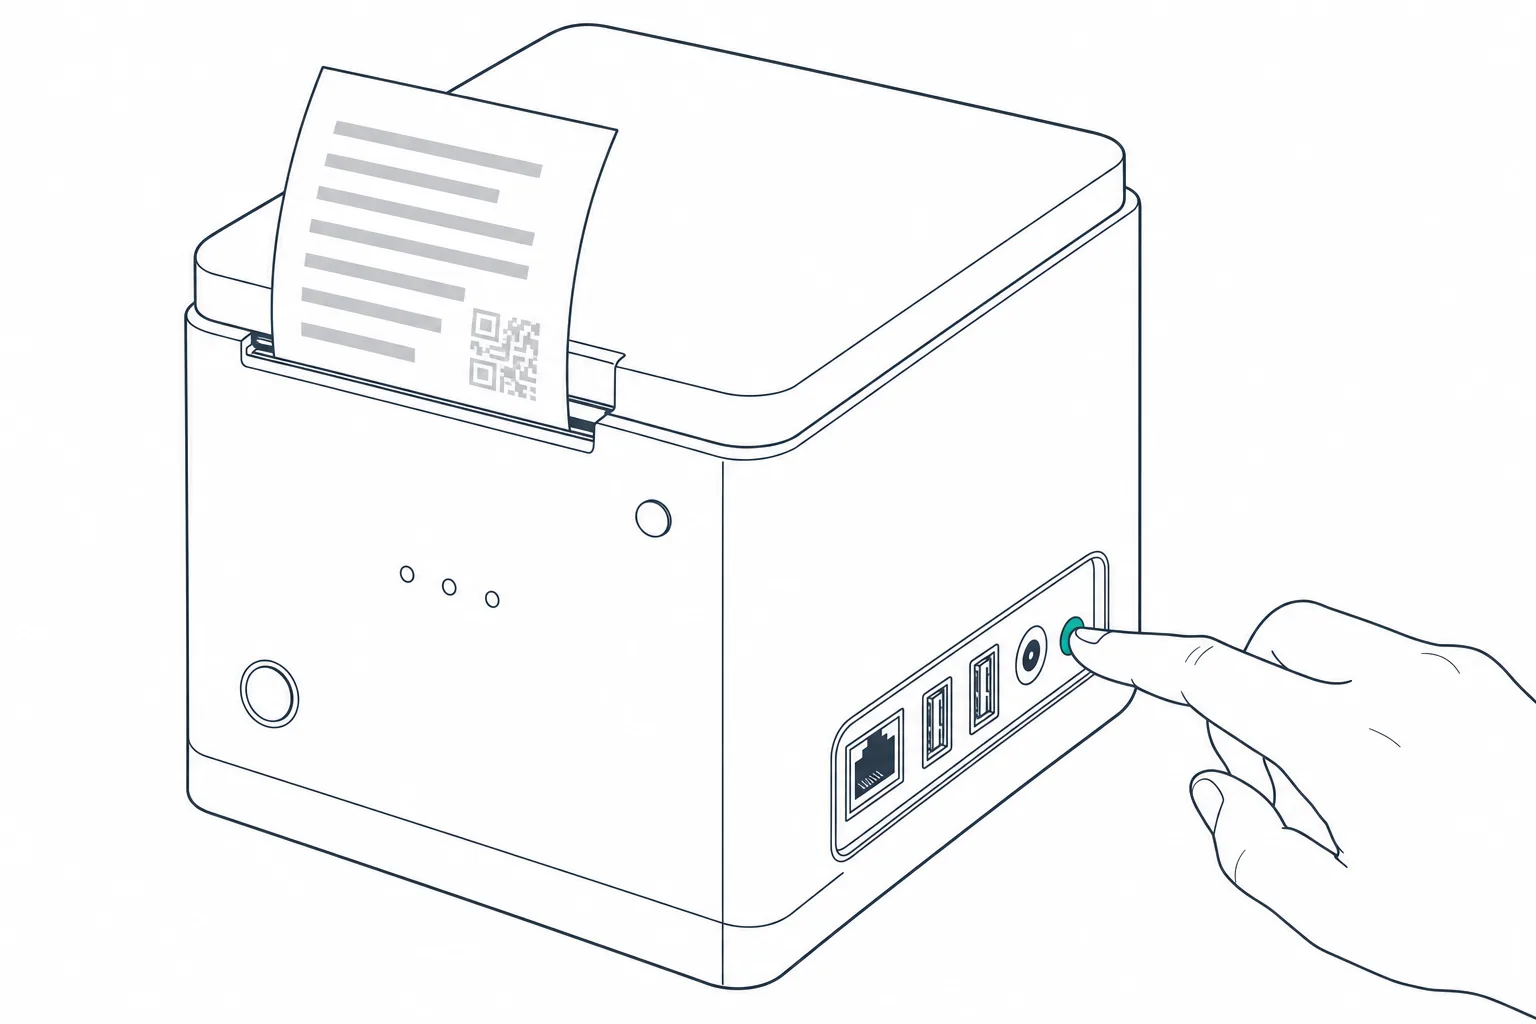
Hold the status-sheet button
Hold the status-sheet button ≥ 3 seconds
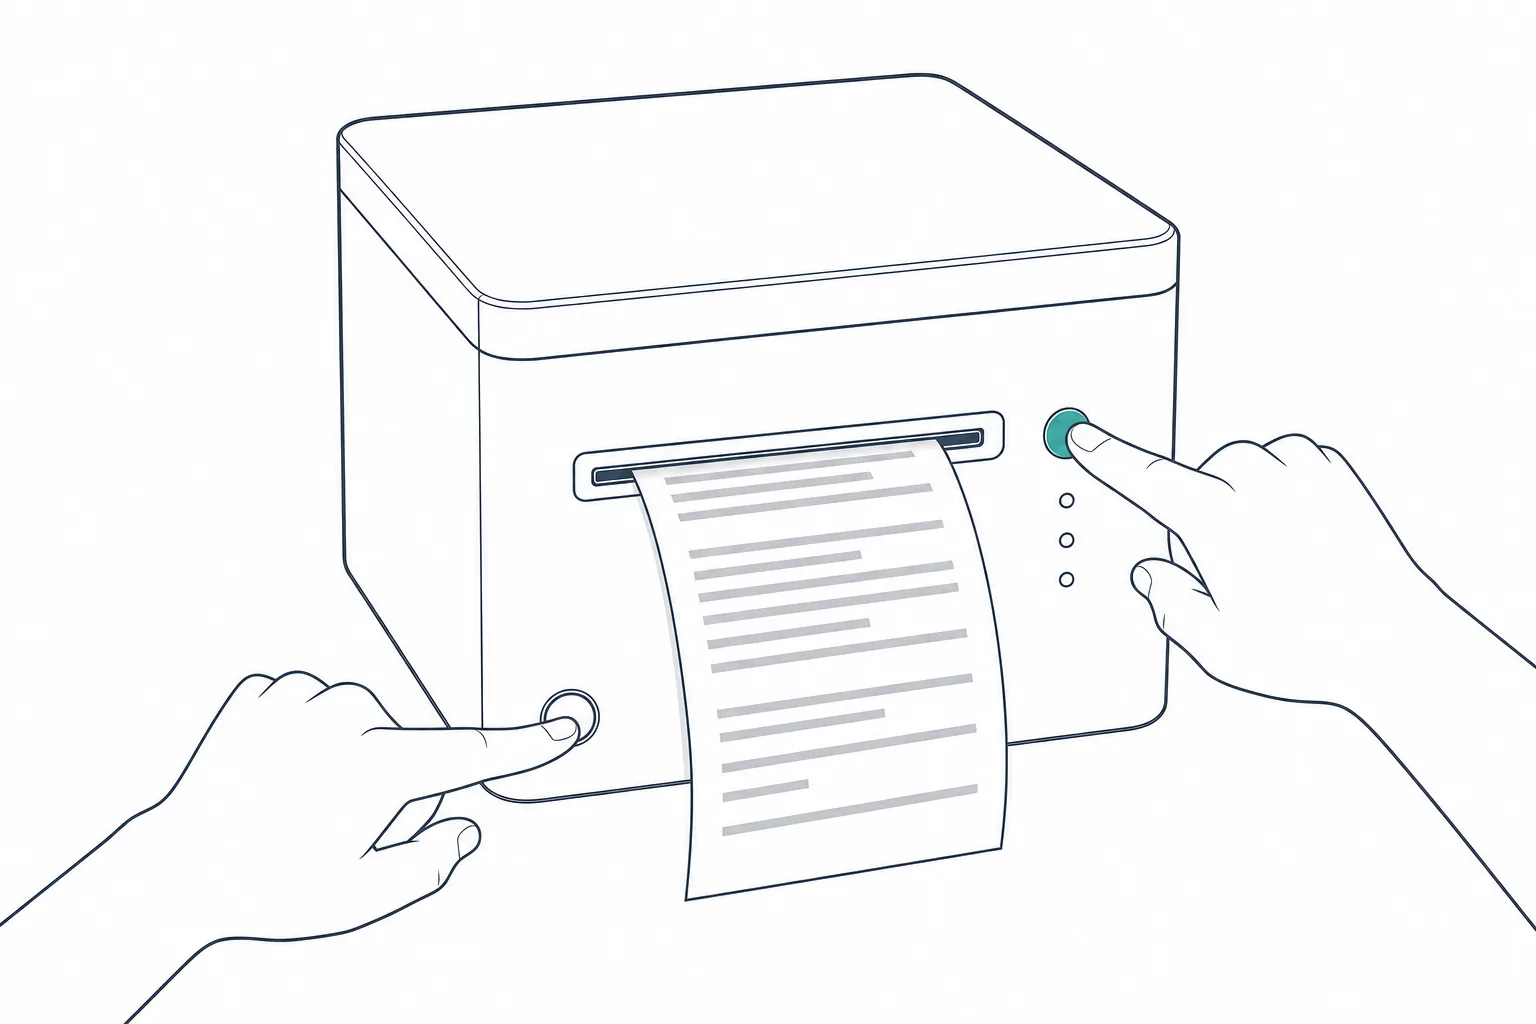
No cover to remove? Use Feed instead
Cover open, hold Feed ≥ 1 second
A different printout — the self-test — comes from holding Feed while switching the printer on. It shows the serial number and firmware version, not the network details, but that serial number is exactly what you'll need to log into the web page on a TM-m30II or TM-m30III (§07). If nothing prints when you ask for a status sheet, wait about a minute: with no network cable and no DHCP server, these printers fall back to a fixed address of 192.168.192.168 roughly sixty seconds after power-on.
No DHCP? Fixed fallback address: 192.168.192.168
05 · WIRED: ETHERNET
The connection that always works
Every model in the family — Standard, Wi-Fi, Bluetooth, every SKU — has a built-in Ethernet port. If you only read one section, make it this one. And an important point for non-networkers: only the PRINTER uses this cable. Your iPad, phone or laptop stays on normal Wi-Fi — no cable ever runs to them. All that matters is that printer and device end up on the SAME network (the same router).
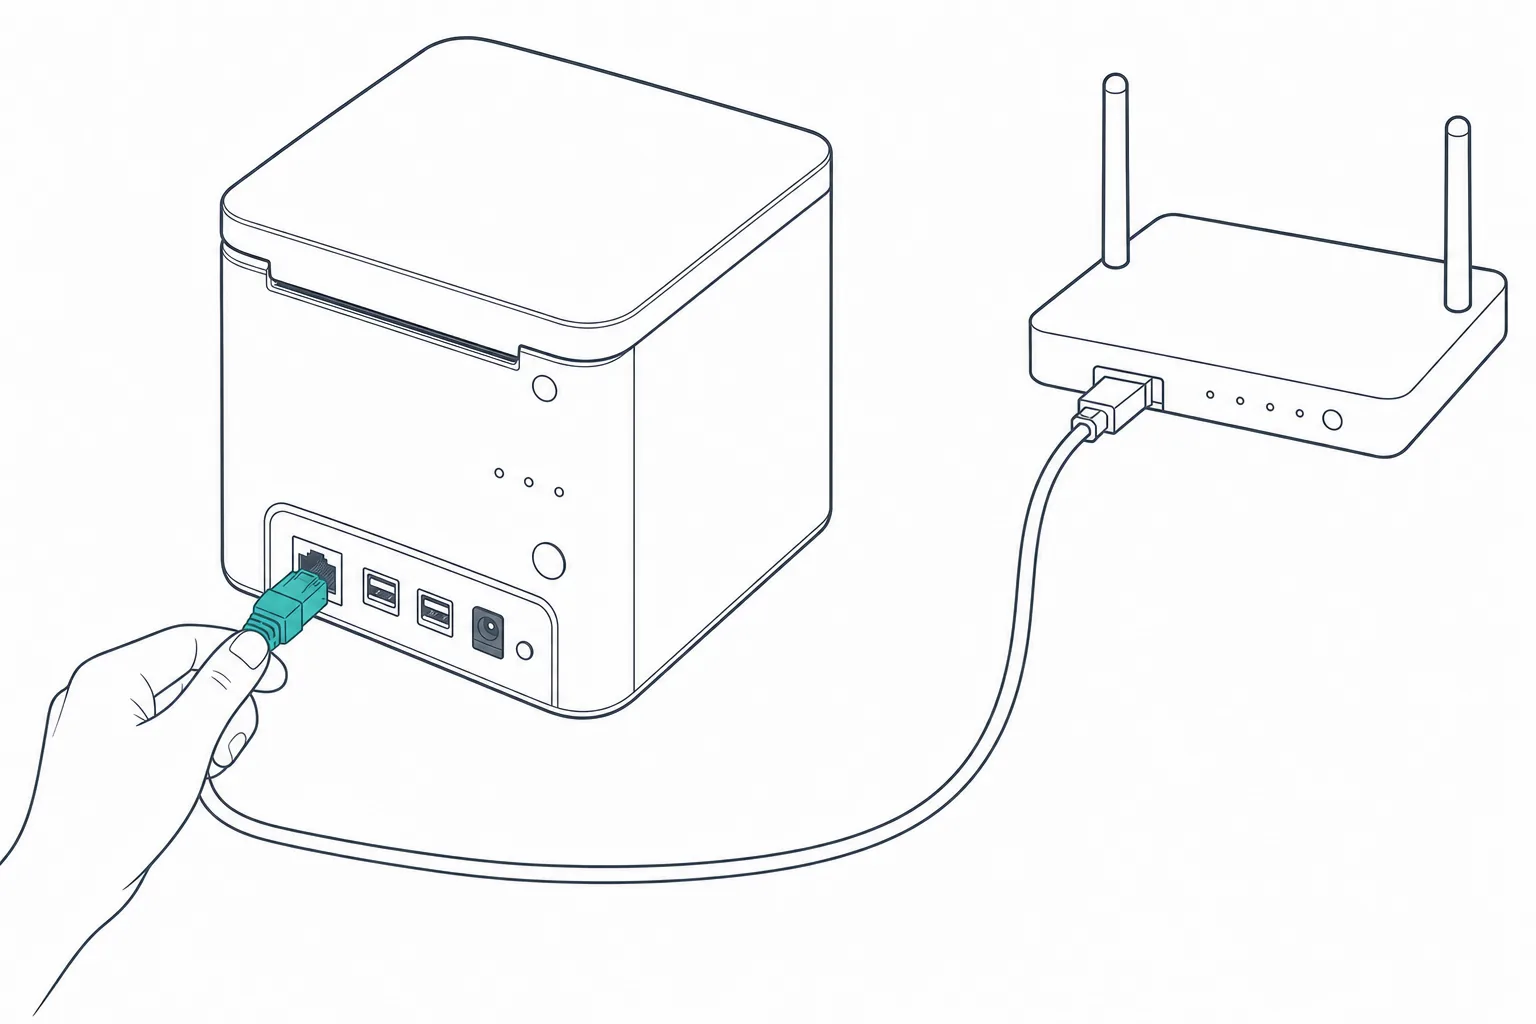
Plug in the cable
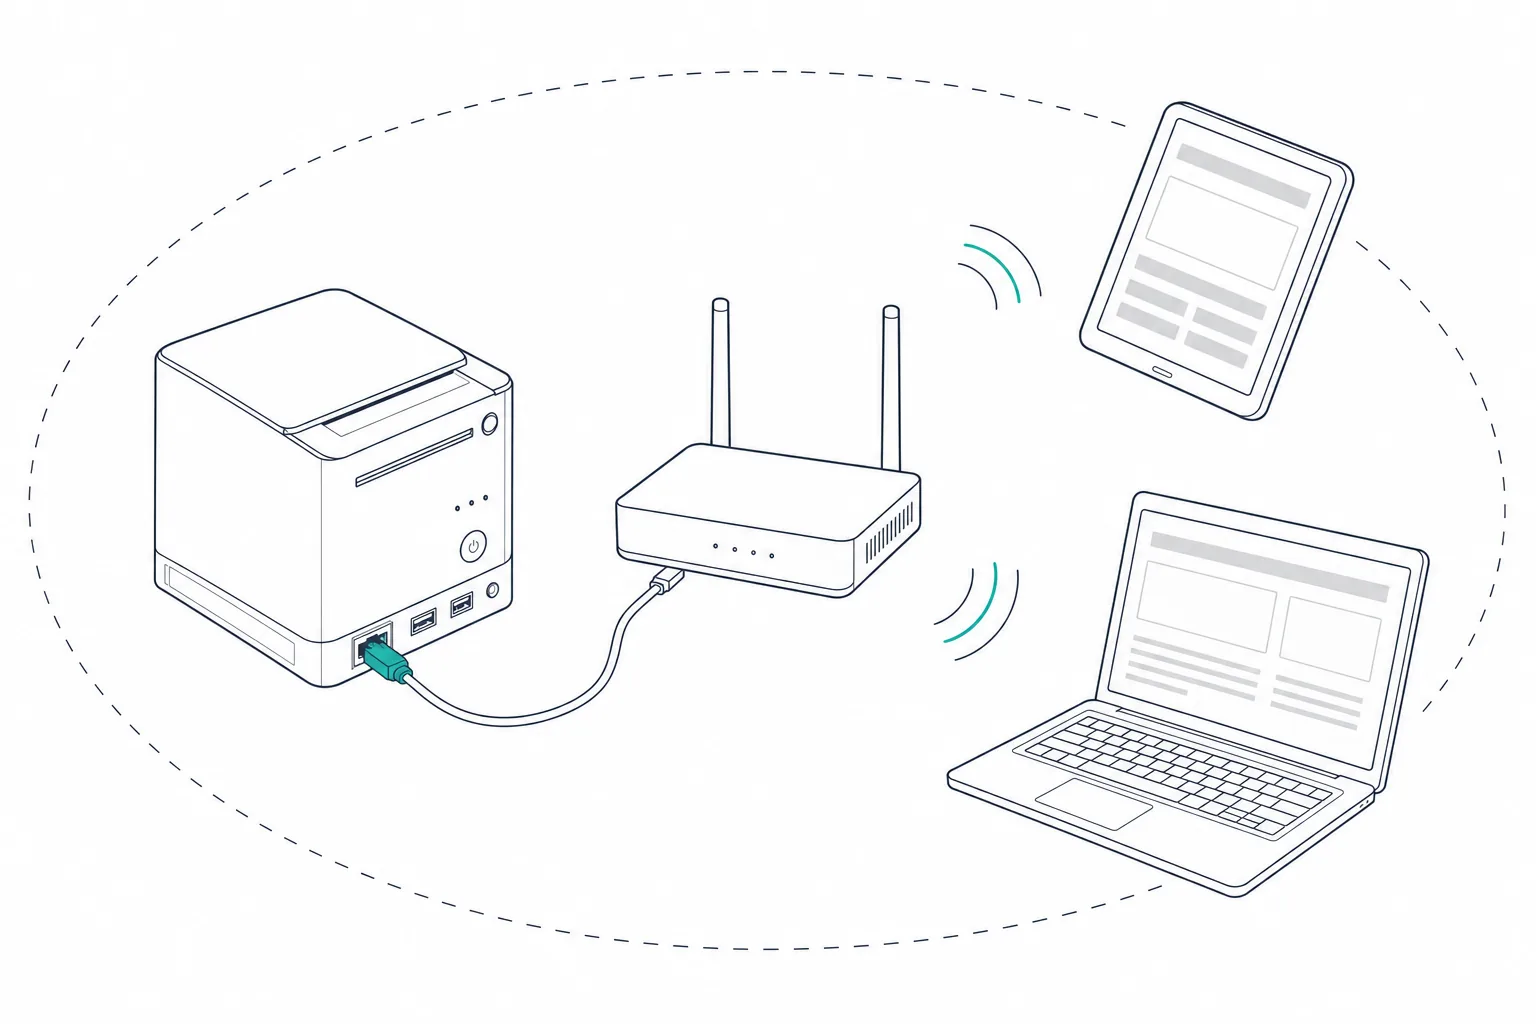
One network, two ways onto it: the printer joins by cable (or dongle), your iPad and laptop join over Wi-Fi. Nothing is ever wired to the tablet — same router is all that counts.
06 · WIRELESS VIA THE DONGLE
Making a wired-only printer go Wi-Fi
Only some factory SKUs have Wi-Fi built in. Everything else — including every Standard-model unit — takes an official Epson dongle instead, and the three models don't all take the same one.
Bought the Wi-Fi (or Wi-Fi + Bluetooth) SKU already? Skip this section — the radio is already inside the case, and the dongle port stays empty.
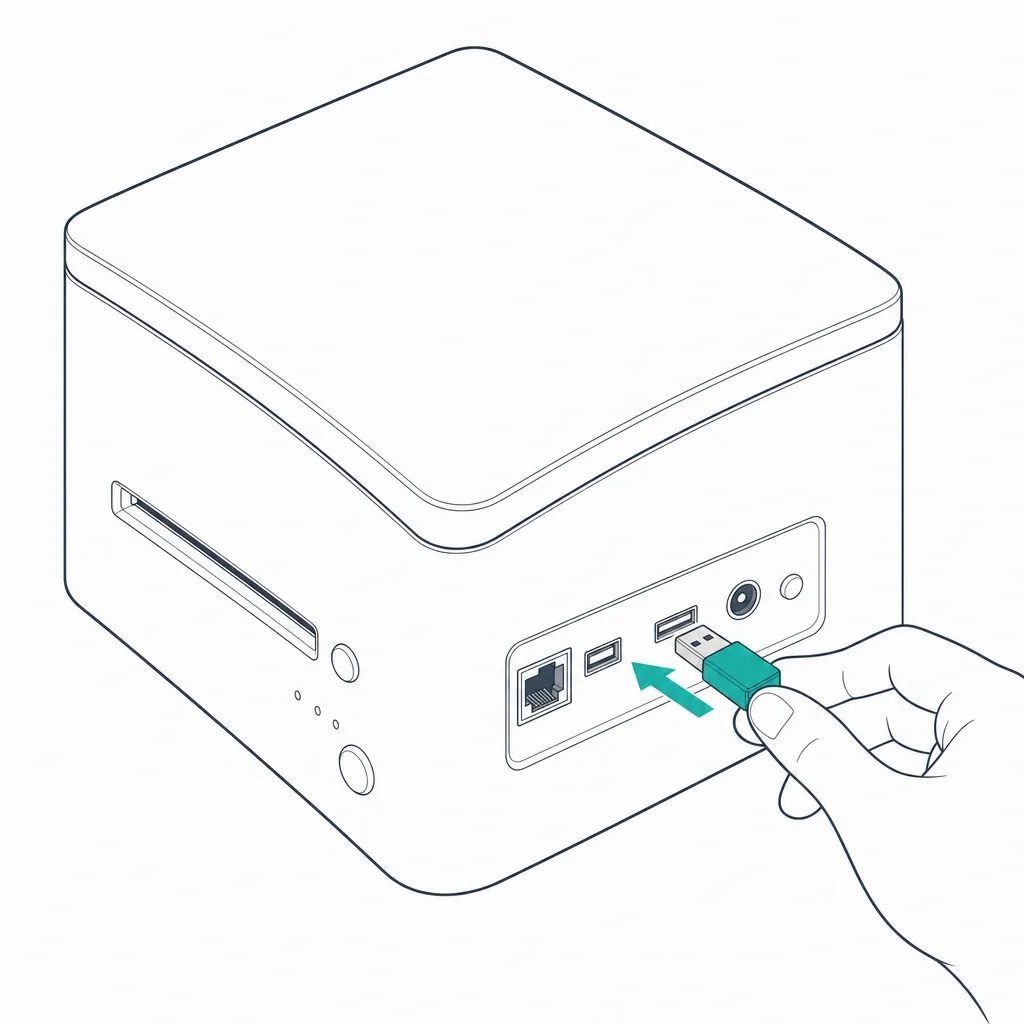
Fit the dongle, then join your network
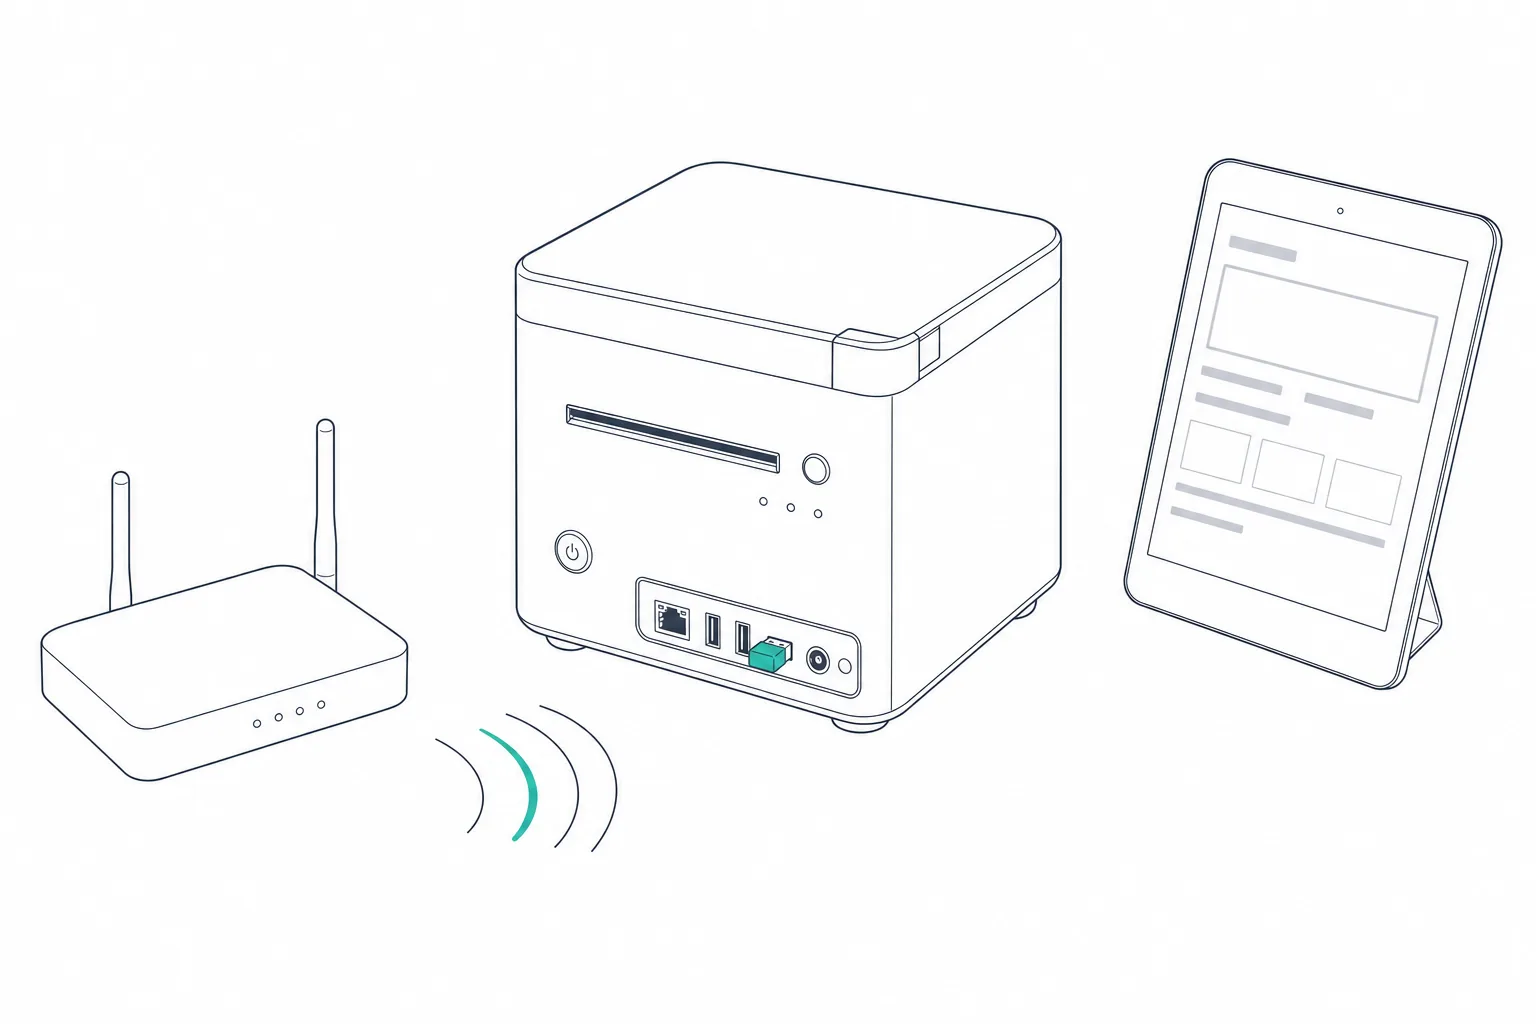
Join it to your Wi-Fi
OT-WL02 / OT-WL05 default setup passphrase: 12345678
The OT-WL05 needs printer firmware 1.10 or later to work on a TM-m30 — check your printer's firmware version (visible on the self-test printout, §04) against Epson's own documentation for your exact model before you buy a dongle.
07 · THE WEB CONFIG PAGE
The printer's own settings, in a browser
Once it has an IP address, every model in the family serves its settings as a web page. Open it from any device on the same Wi-Fi — your laptop or iPad connects wirelessly as usual; there is no cable between your device and the printer.
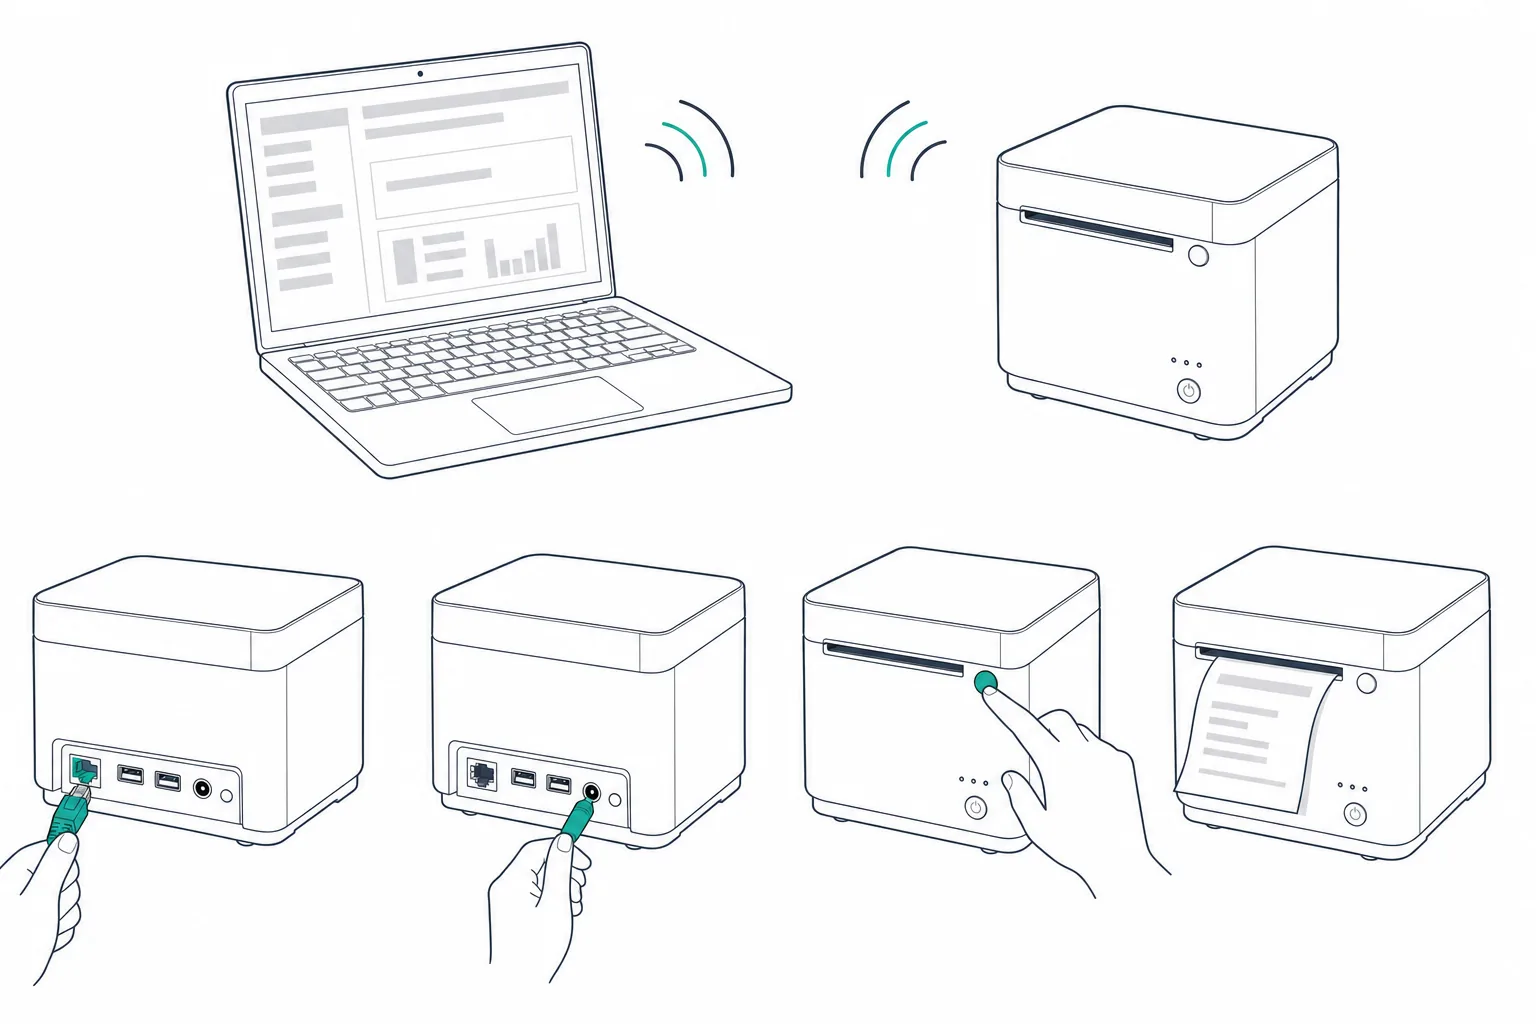
Open its address in a browser
Full per-model login details are in the table in §01 above.
08 · ENABLE SSL & TRUST THE CERTIFICATE
The one step almost every guide skips
This is the step our founder's own setup hit blind, and the reason this guide exists. Skip it, and a dashboard loaded over https will silently fail to reach a printer on http — with no error message that tells you why.
Do this once, per browser, per device
A TM-m30II serves https with a self-signed certificate out of the box — no toggle to find, verified on real hardware. TM-m30III's own documentation says the same is true out of the box for that model, though we haven't yet run it on a physical unit ourselves. Either way, the certificate is self-signed, so every browser will refuse it once — until you visit the printer's https address directly and accept the warning. That trust is per browser and per device: accepting it on your iPad does nothing for a laptop that also prints to the same printer.
This trust isn't permanent on every browser
On Safari and iPadOS specifically, that one-time trust can silently expire — often within a day — even though nothing about the printer changed. Chrome's desktop behavior appears to persist it for longer, though we haven't pinned down its exact expiry rule. Either way, the dashboard now checks each printer's connection on its own and shows a fix button — "Open printer page" plus "Check again" — right where printing happens, so a merchant never has to guess why prints silently stopped.
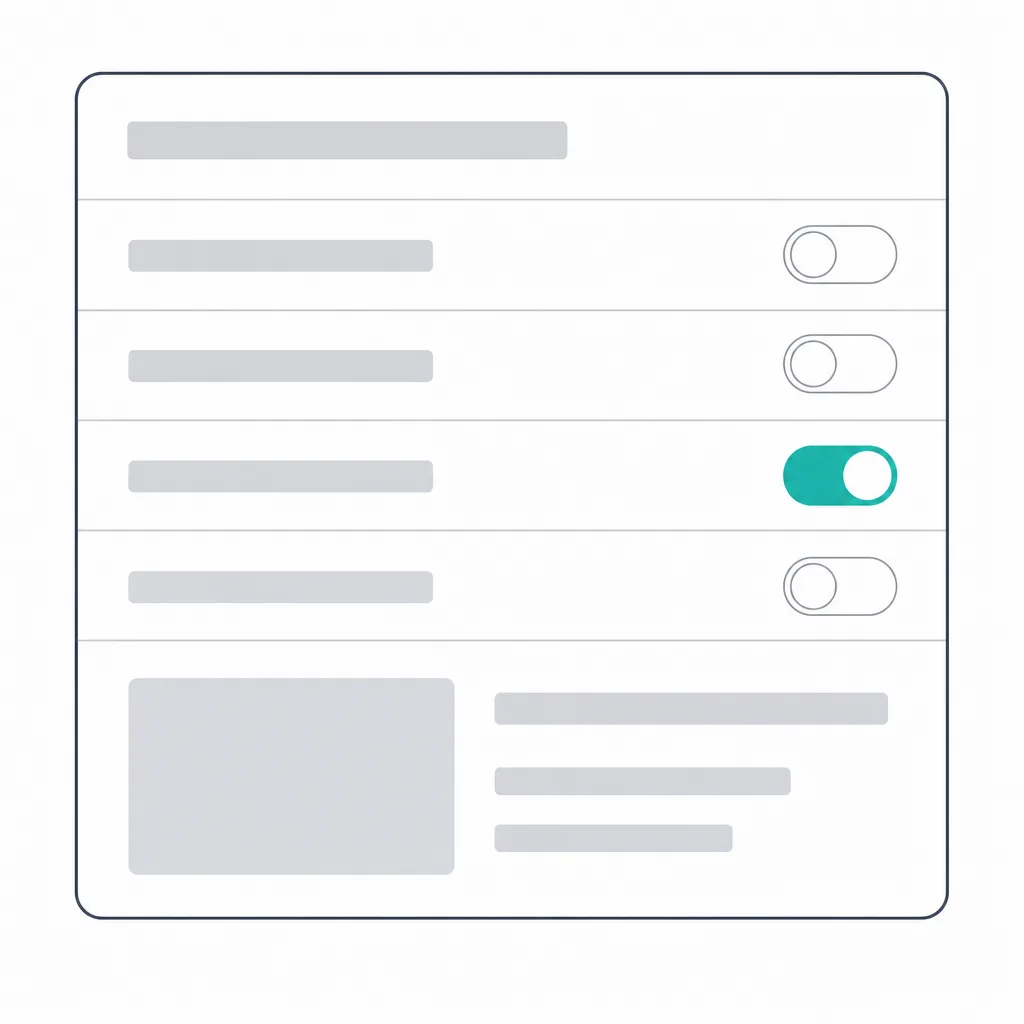
Turn on HTTPS, if it isn't already
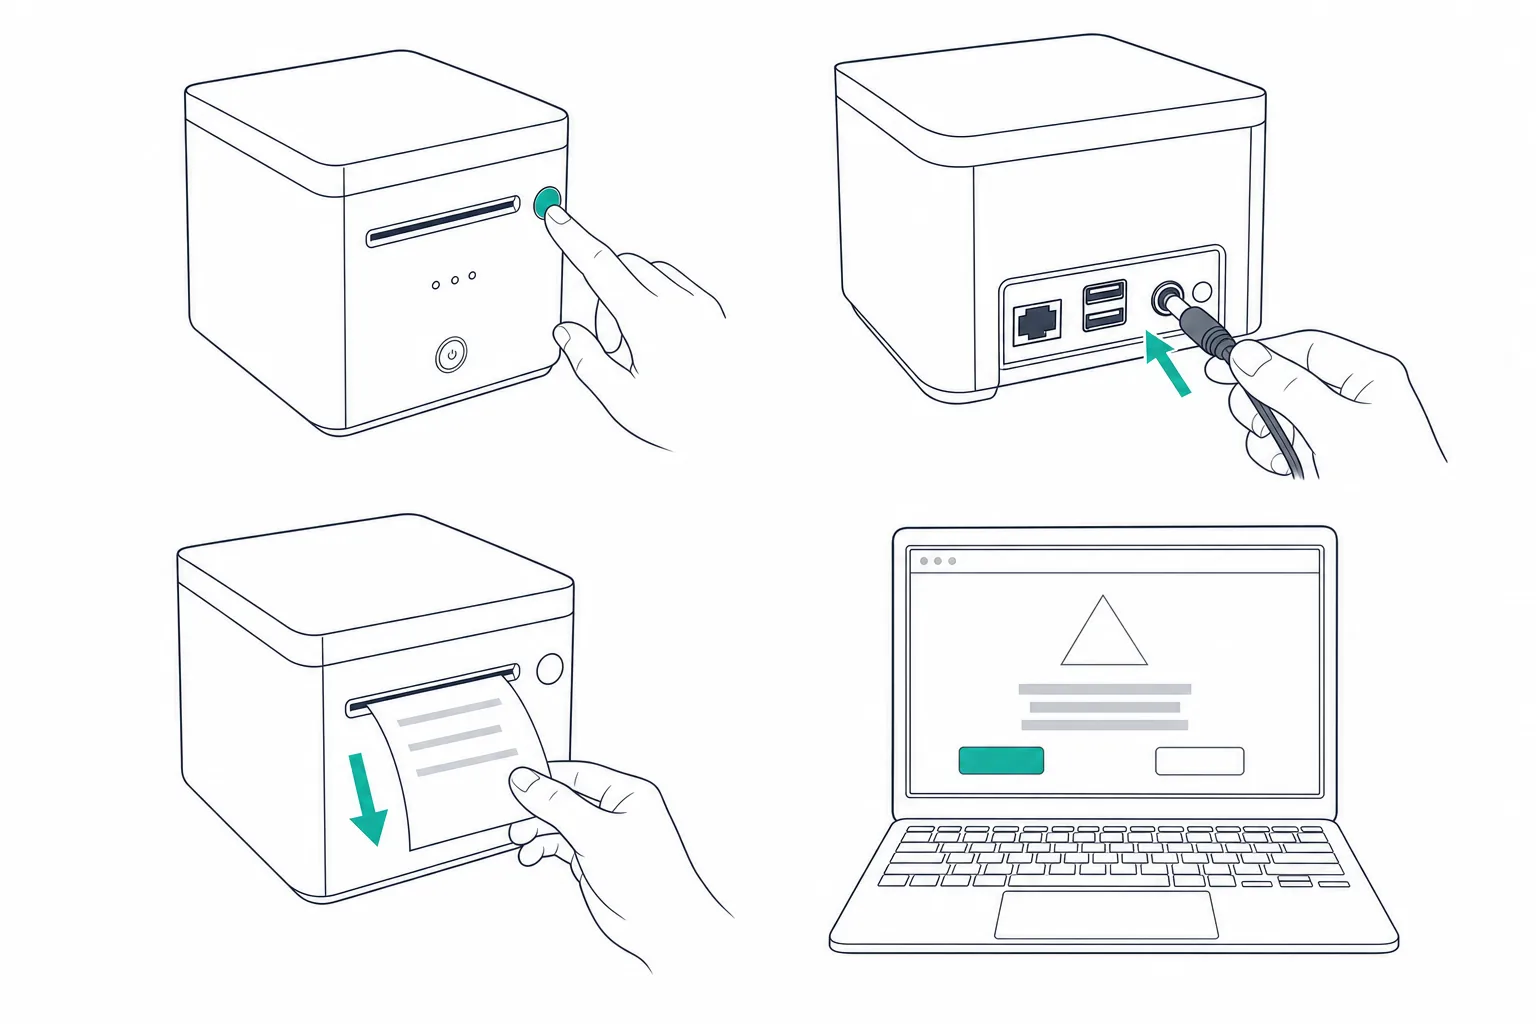
Visit the printer's https address once, and accept it
https://{the printer's IP address}
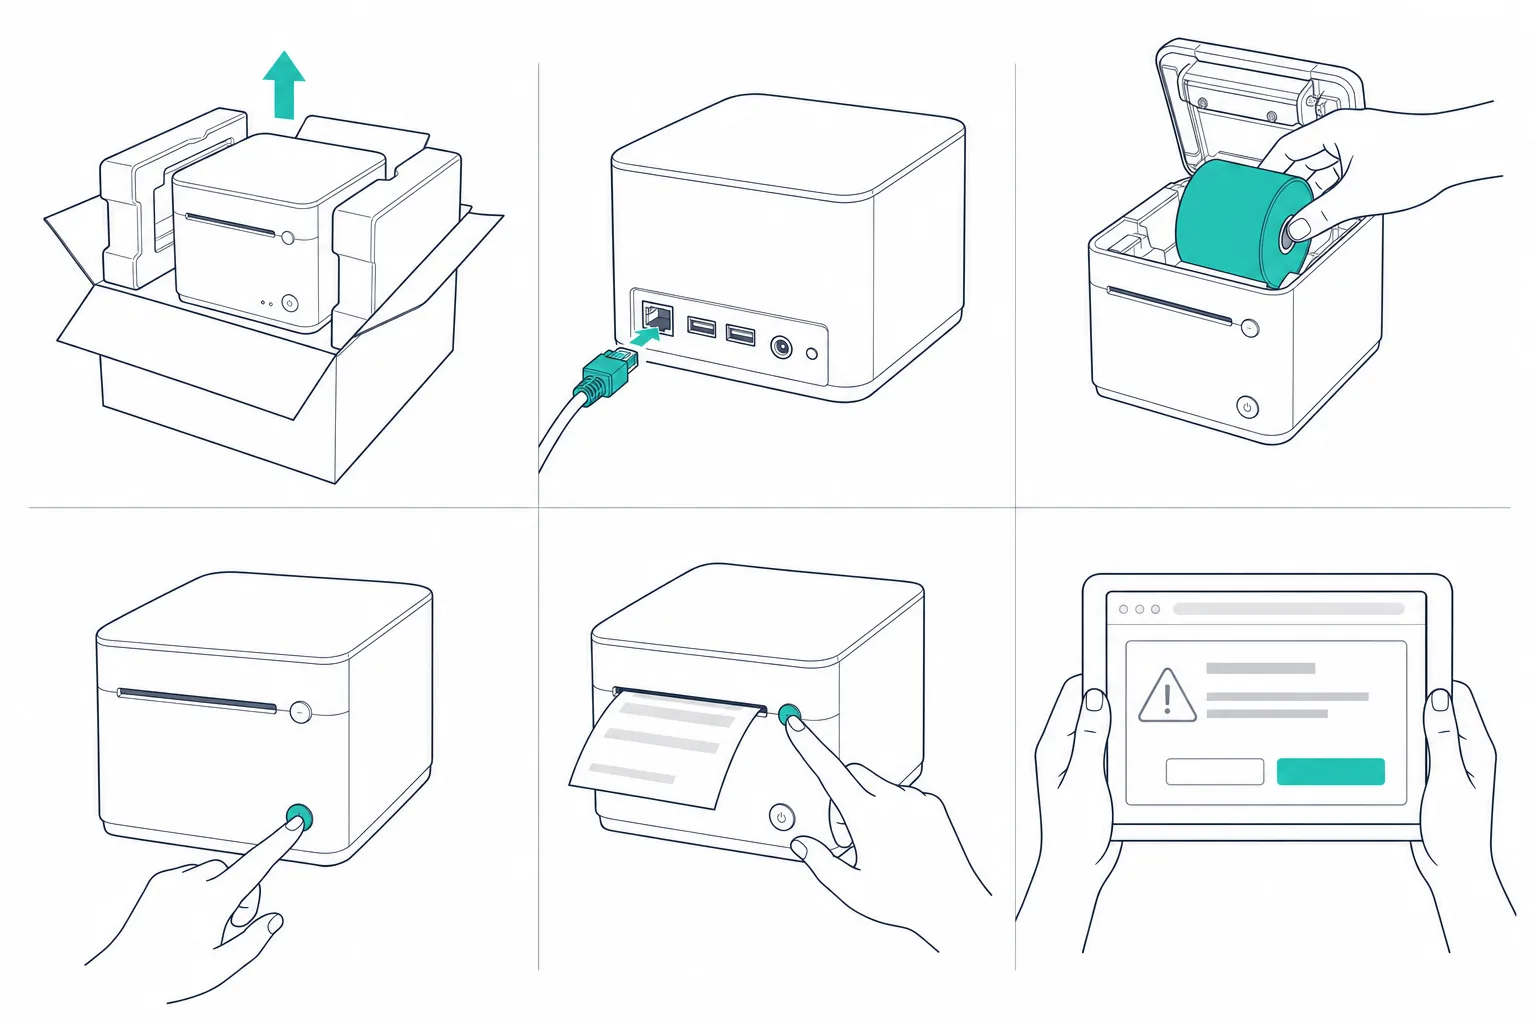
What that warning looks like, browser by browser
Safari & iPadOS
Safari shows "This Connection Is Not Private" with a Show Details disclosure. Tap Show Details, then "visit this website", and confirm. iPadOS Safari behaves the same way — do this once on the iPad you'll actually run the counter screen on.
Chrome
Chrome shows "Your connection is not private" (NET::ERR_CERT_AUTHORITY_INVALID). Click "Advanced", then "Proceed to (unsafe)" — the wording sounds alarming; it means exactly what this whole section describes.
Firefox
Firefox shows "Warning: Potential Security Risk Ahead". Click "Advanced…", then "Accept the Risk and Continue".
Any other browser
Every current browser shows some version of this warning for a self-signed certificate, and every one has the same two-click shape: an "Advanced" or "Details" disclosure, then an explicit "proceed anyway" choice. None of them will do this silently, and that's by design — you're the one confirming you trust this specific printer.
09 · CONNECT TO LOUDCURTAIN QUEUER
Add it in the wizard, print a test, done
Everything above was preparing the printer. This is where it meets the dashboard — over the network, wirelessly from your tablet’s point of view. The tablet and printer never touch: your tablet talks over Wi-Fi, the printer listens on the same network.
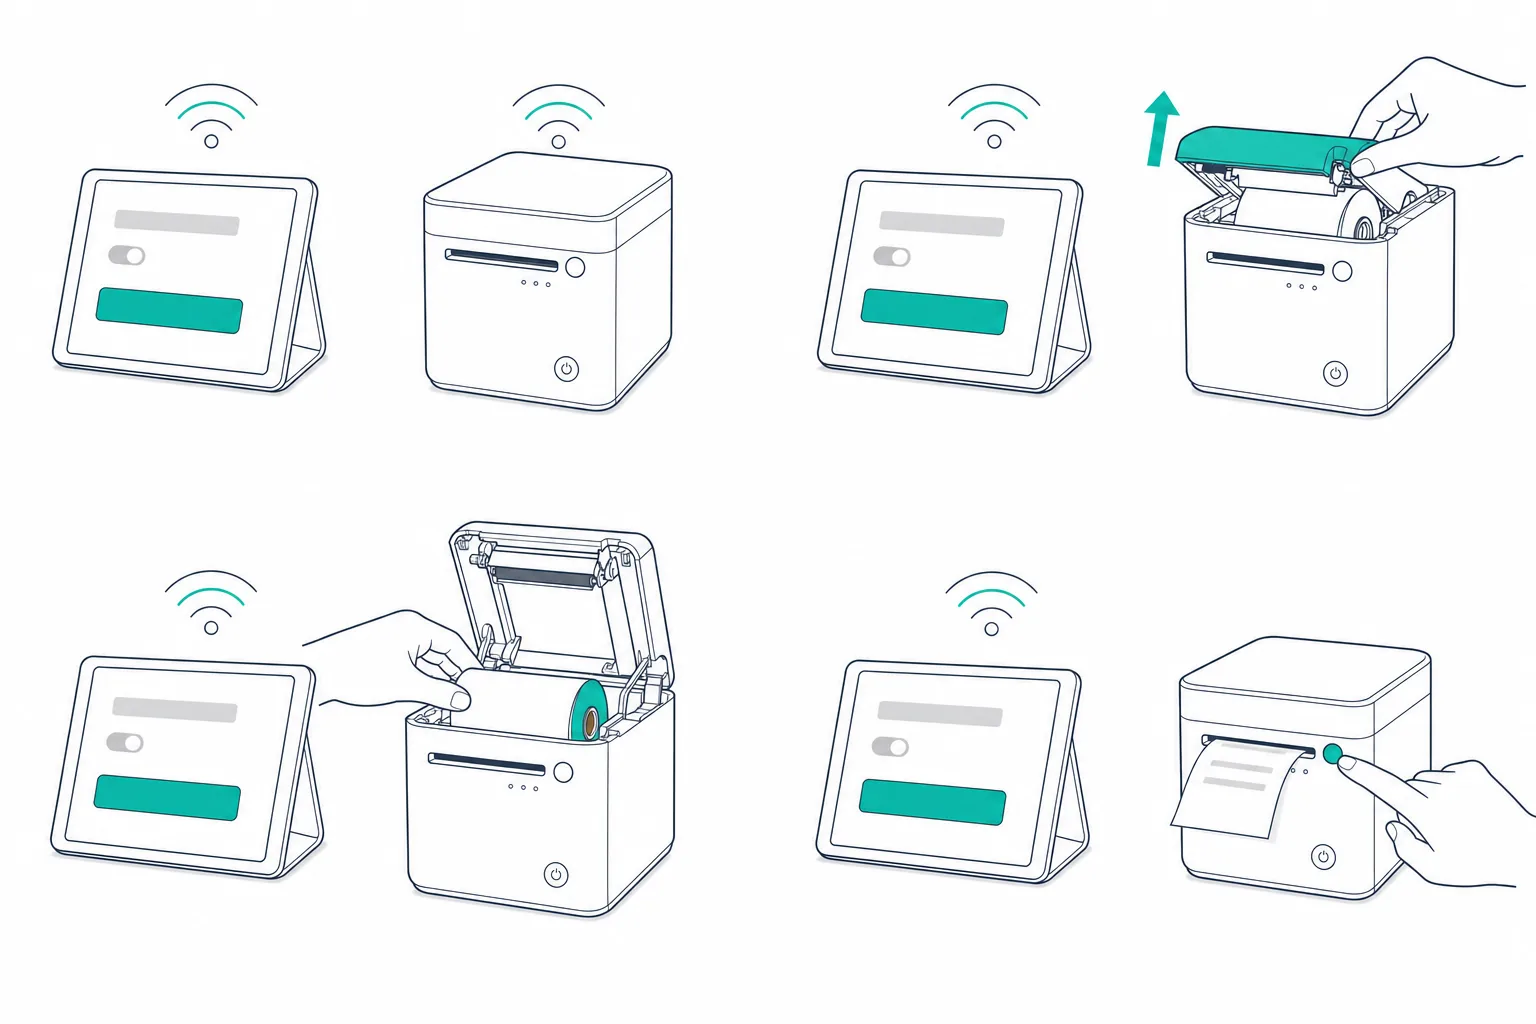
Add the printer in the wizard
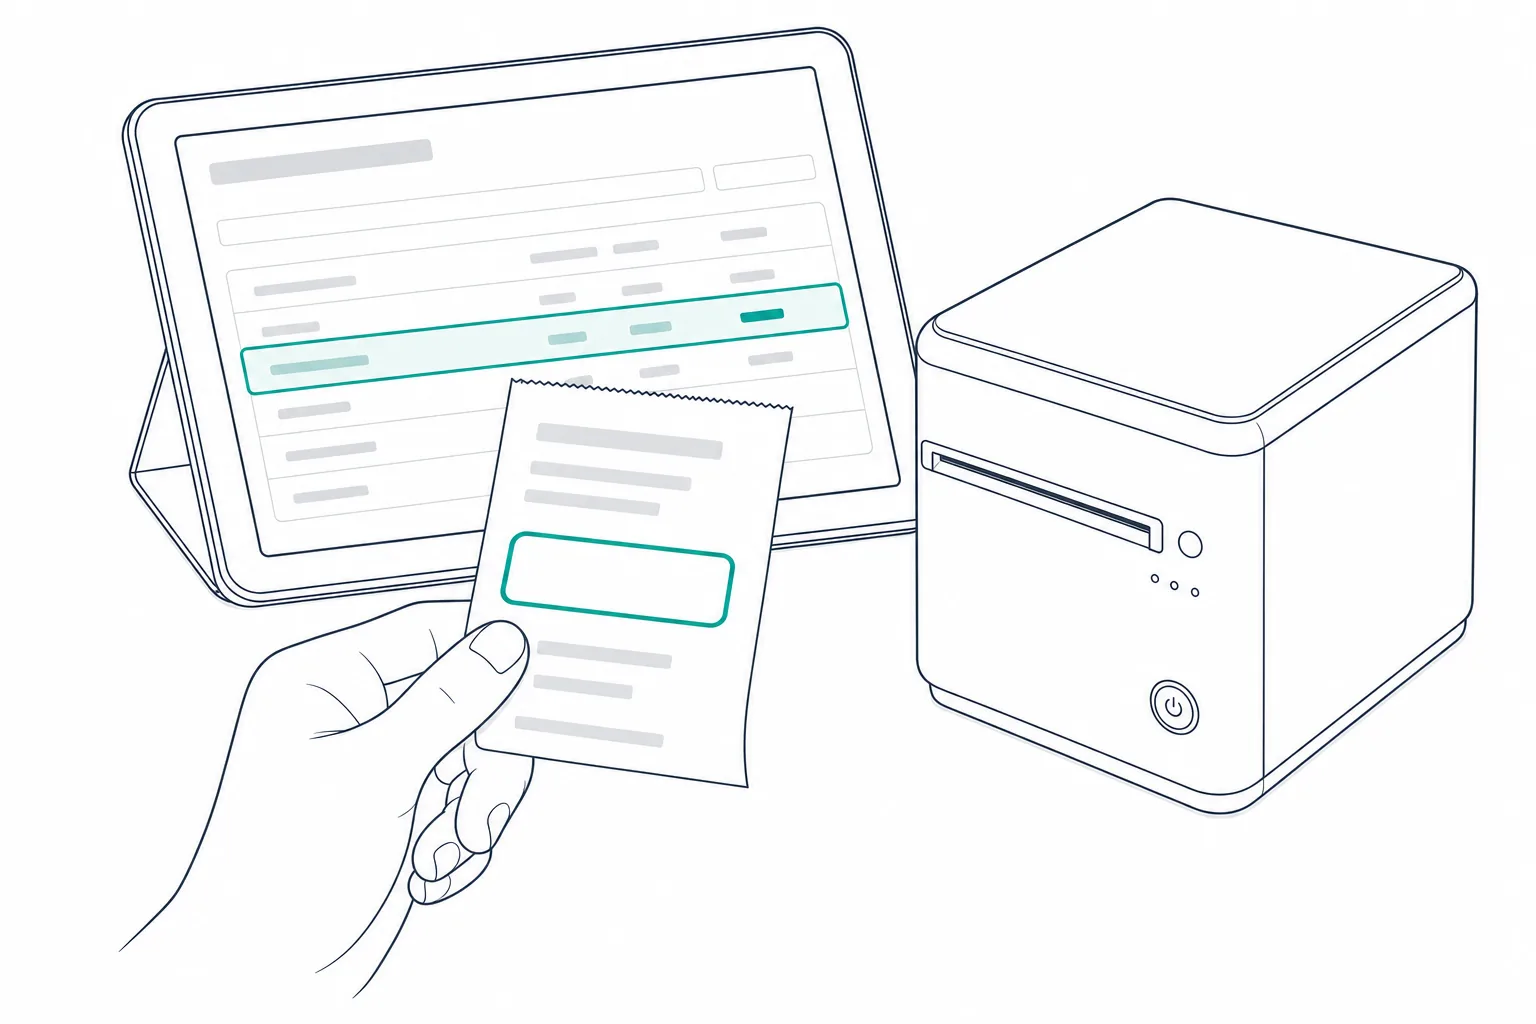
Print a test ticket and type the code
10 · TROUBLESHOOTING
Six things that go wrong, and the actual fix
In the order we've seen them, not the order that sounds most dramatic.
- Holding the status-sheet button prints nothing
- The cover isn't fully closed, or there's no paper loaded — the printer refuses to print status information (or anything else) in either state.
- Check the roll-paper cover is fully closed and there's paper loaded — the printer won't print with the cover open. If you're on a TM-m30III, remember the first hold only prints a menu; you then briefly press Feed to choose the status sheet before it actually prints.
- The IP on the status sheet doesn't match what your router shows
- Ethernet and Wi-Fi are two separate interfaces with two separate addresses, and enabling one on these models disables the other.
- The status sheet shows whichever interface is currently connected — Ethernet and Wi-Fi each get their own address. If both are wired in at once, note that plugging in Ethernet disables the built-in Wi-Fi radio on these models, so print a fresh status sheet after changing either connection.
- The dashboard says it can't reach the printer, but the printer's own web page loads fine
- The certificate trust from §08 is per browser and per device, not per printer — a background request from a different context hasn't visited the printer's https address yet.
- This is almost always the certificate step (§08) — your browser trusts the printer's page because you visited it once, but a background request from the dashboard hasn't. Revisit the printer's https address directly in the same browser and accept the warning again if you've since cleared browsing data.
- Browser console shows a mixed-content or "blocked insecure content" error
- Modern browsers block a secure (https) page from quietly loading insecure (http) content, including a print request to a LAN printer.
- Your dashboard is loaded over https and is trying to reach the printer over plain http. Enable SSL on the printer (§08) instead, then switch the wizard's connection to https — mixing https and http like this is exactly what modern browsers refuse to do silently.
- The Wi-Fi dongle doesn't show up in the printer's wireless menu
- The dongle is not hot-swappable, or it's the wrong part number for this model.
- Power the printer off before fitting or removing the dongle — it isn't hot-swappable. Confirm you bought the dongle for the right model (§06); an OT-WL02/OT-WL05 will not work in a TM-m30II or TM-m30III, and an OT-WL06 will not work in an original TM-m30.
- ePOS-Print returns a 404 or "service not found"
- The address is mistyped, or the printer's ePOS-Print setting is switched off in its web config page.
- Check the address ends exactly in /cgi-bin/epos/service.cgi?devid=local_printer and that the printer's ePOS-Print setting is enabled in its web config page (§07) — on the original TM-m30 this isn't guaranteed to be on by default.
Questions we actually get
Do I need to buy a dongle if I already have a "Wi-Fi model"?
No — a factory Wi-Fi (or Wi-Fi + Bluetooth) SKU has the radio built in, and the dongle port stays empty. The dongle is only for a Standard (wired-only) unit, which includes every TM-m30III Standard model.
Is the certificate-trust step really mandatory?
For https, yes, on every model and every browser we've documented. It's a one-time visit per browser per device, not a recurring step — but skipping it is the single most common reason a working printer looks broken from the dashboard.
Have you actually run all three models?
No, and we say so on this page rather than after you've bought one. The TM-m30II is hardware-verified on our own bench, with a date. The TM-m30 and TM-m30III are built to their published specification and covered by our own tests, but no physical unit of either has printed through our system yet — the badge on each row in §01 says which is which, and it updates the moment that changes.
Which model should I actually buy?
The TM-m30II, for two reasons that have nothing to do with brand loyalty: it's the one we've verified on real hardware, and its OT-WL06 dongle path is the simplest of the three if you'll ever need Wi-Fi. The TM-m30III is newer and faster; the original TM-m30 is the one most likely to turn up secondhand.
Does LoudCurtain Queuer process the payment through this printer?
No. We never touch payment. This printer prints a prep slip once you've charged the customer on your own card terminal or in cash — it has no role in taking money, and nothing on this page changes that.
What if my printer is an m30II-H, m30II-NT, or another OmniLink variant?
Everything on this page about the base TM-m30II — its connectors, its default login, its out-of-the-box https behaviour — applies to those variants too, since they share the same firmware family. Their extra hardware (extra USB ports, a tablet-charging port, iOS network tethering) isn't covered here; check that variant's own manual for those extras specifically.
Set up your printer, then your counter
Free to start, and we never take a cut of what you charge.